
This site stays free thanks to small commissions from links like the ones below — it never costs you anything extra, and it never changes what we recommend. As an Amazon Associate we earn from qualifying purchases. Learn more.
A DIY filter made from a bottle and layered materials can turn cloudy, debris-filled water into something clear enough to then disinfect safely — but it’s a pre-treatment step, not a substitute for killing pathogens. This guide covers how to build a DIY water filter, what it actually does, and the disinfection step you still need afterward.
Quick answer
A layered bottle filter (charcoal, sand, gravel, cloth) removes sediment, debris, and some odor/taste — it makes water clearer, but it does not reliably remove pathogens like bacteria, viruses, or parasites. After filtering, you still need to boil, treat with chemicals, or use a certified filter rated for microorganisms before drinking.
What a DIY filter actually does (and doesn’t do)
- Removes: visible sediment, dirt, debris, and some improves taste/odor via activated charcoal.
- Does NOT reliably remove: bacteria, viruses, protozoa (like Giardia and Cryptosporidium), or dissolved chemicals. The pore sizes in improvised layers are far larger than what’s needed to filter out pathogens.
- Think of it as pre-treatment that makes water safe to then disinfect effectively — cloudy water is harder to boil evenly and can shield pathogens from UV or chemical treatment.
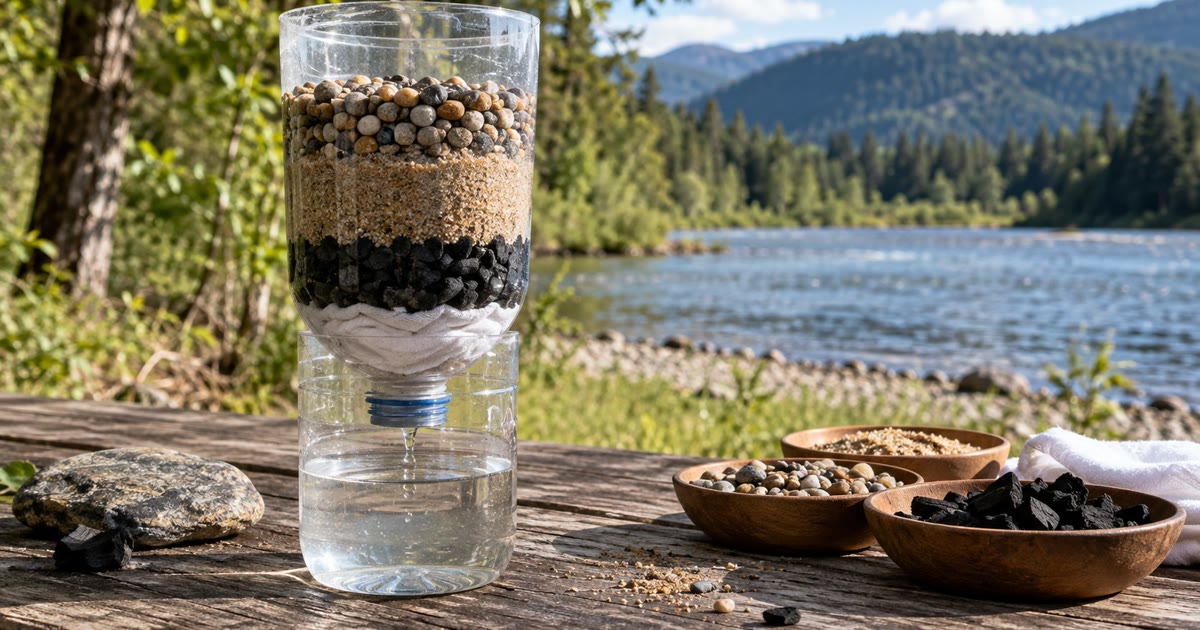
Building a basic bottle filter
- Cut the bottom off a plastic bottle and turn it upside down, cap removed (or poke holes if the cap stays on), to use as a funnel-shaped filter body.
- Layer from the neck (bottom) up:
- A piece of cloth or coffee filter over the opening to hold everything in.
- A layer of fine sand.
- A layer of crushed charcoal (from a dead campfire, cooled and crushed — activated charcoal works even better if you have it).
- A layer of coarse sand or small gravel.
- A top layer of larger gravel or small stones to break the force of poured water and catch large debris.
- Pour contaminated water in slowly from the top; let it filter through and collect in a clean container below.
- Repeat the pour 2–3 times through the same filter for noticeably clearer results — the first pass is often still cloudy.
- Rinse or rebuild the filter once it clogs or the water stops running through at a reasonable pace.
Simpler improvised options
- A cloth or bandana alone removes larger debris and some parasite eggs/cysts attached to sediment, useful as a quick pre-filter before boiling.
- Letting water settle in a container for an hour lets heavier sediment sink, so you can pour off the clearer water above it.
- A sock or t-shirt filled with sand and charcoal, tied off and used the same layered way, when you don’t have a bottle.
After filtering: you still need to disinfect
Filtering clears the water; disinfection kills what’s actually dangerous. Choose one:
- Boiling: a rolling boil for 1 minute (3 minutes above 6,500 ft elevation) kills essentially everything. The most reliable method if you can build a fire or have a stove.
- Chemical treatment: purification tablets or unscented household bleach (follow label ratios) — needs clearer water to work reliably, which is exactly what the DIY filter provides first.
- A certified filter or purifier rated for bacteria, viruses, and protozoa, if you have one — see our full guide to purifying water in the wild for the complete comparison of methods.
When to use a DIY filter
- You have no commercial filter and the water is visibly cloudy or full of debris.
- As a pre-filter to protect and extend the life of a real filter cartridge by removing large sediment first.
- In a genuine no-other-option situation, paired with boiling as the actual safety step.
It should never be your only plan — a proper filter or disinfection method belongs in every kit, and the DIY version is a backup skill, not a replacement.
Frequently asked questions
Does a DIY charcoal and sand filter make water safe to drink?
Not by itself. It removes sediment and some odor but doesn’t reliably remove bacteria, viruses, or parasites. Water filtered this way still needs to be boiled or chemically treated before it’s safe to drink.
What materials work best for a homemade water filter?
Layered fine sand, crushed charcoal (ideally activated), coarse sand or small gravel, and a cloth or coffee filter to hold it all in place, built inside an inverted plastic bottle.
How many times should you pour water through a DIY filter?
Two to three times through the same filter typically gives noticeably clearer results, since the first pass is often still cloudy as the layers settle and start working effectively.
Can boiling alone replace filtering dirty water?
Boiling kills pathogens but doesn’t remove visible sediment or debris, and very cloudy water can be harder to boil evenly and may shield some organisms. Filtering first, then boiling, is more effective than either alone.
What’s the difference between filtering and disinfecting water?
Filtering removes physical particles like sediment and debris, improving clarity and taste. Disinfecting (boiling, chemical treatment, or a certified microbiological filter) kills or removes the pathogens that actually cause illness. You generally need both steps.
Is charcoal necessary in a DIY water filter?
Not strictly, but it improves taste and odor and helps adsorb some contaminants. A filter with just sand and gravel layers still removes sediment effectively, even without charcoal.
Bottom line
A layered bottle filter is a genuinely useful skill for clearing debris and sediment from dirty water, but it’s a pre-treatment step, not purification. Always boil or chemically treat filtered water before drinking, and keep a certified filter in your kit as your primary method.
Related guides
💧 How to Purify Water in the Wild
💧 How to Store Water for Emergencies
⏱️ How Long Can You Survive Without Water?
This article is for general informational purposes only. A DIY filter is not a substitute for proper disinfection. Sources: CDC safe water guidance; EPA emergency disinfection of drinking water; U.S. Forest Service backcountry water treatment guidance.