
A bow is a primitive weapon invented by our ancestors used to hunt long distances by shooting arrows. People then were so adept in making bow and arrows from scratch. But there are still some individuals who do it to this day.
Emergency scenarios like when you find yourself stranded in a lonely forest require the initiative to do actions that protect yourself.
Knowing how to make a bow string in an instance is a powerful skill you can apply in the wilderness.
You will get to use some materials that are already in your home. Thus, you won’t need to buy ready-made bow strings anymore.
What is a Bow String Made of?
A bow string must not stretch and has only one length. This prevents the lessening in the driving force to push forward the arrow.
There are different materials found in your home or in the wilderness that you can make use.
These includes nylon, fishing line, hemp, twine, etc. In the wilderness, you can even use the hide of an animal.

Linen was the traditional material for the bow string in middle ages especially in England for their war bows and hunting bows.
However, since it’s a natural fiber, linen is not as durable as synthetic fibers in strength and great resistance to fatigue.
The modern string materials for bows that are used today and can be bought in stores includes Dacron that is recognized for its durability because it’s a synthetic fiber.
One strand of this material has the strength of up to 50 lbs. Dacron is proved to last a long time.
Another synthetic fiber that is used includes Kevlar. Bow string made of this material can take up draw weight with a maximum of 70 lbs. It is thinner compared to Dacron, and it results in faster arrow velocity.
The downside to this string is that they don’t last long as the repeated stretching can cause fatigue, causing the bow string to snap.
How to Make a Bow String?
Create with already-available materials
Bow strings tend to weaken over time and will eventually snap. If you can spare some time, you should consider making it on your own with the materials found in your home.
In this article alone, we will show you how to make a bow string that won’t need any jigs or several hooks.
The Flemish string is very simple to make as you only need one hook to complete the task. Flemish string is divided into two types: single loop and double loop.
Make a Flemish String
A single loop has an eye loop tied at the top part of our bow, and the bottom part is a timber hitch knot. You can adjust the length of the string by twisting or untwisting the timber hitch knot.
As for the second type of Flemish string which is the double loop string, it has double eye loops at both ends. It is adjusted by twisting and untwisting on either end. This type is common in recurves and longbows.
To make a Flemish string in single loop, you will need the following materials:
- One nail
- B50 Dacron bow string
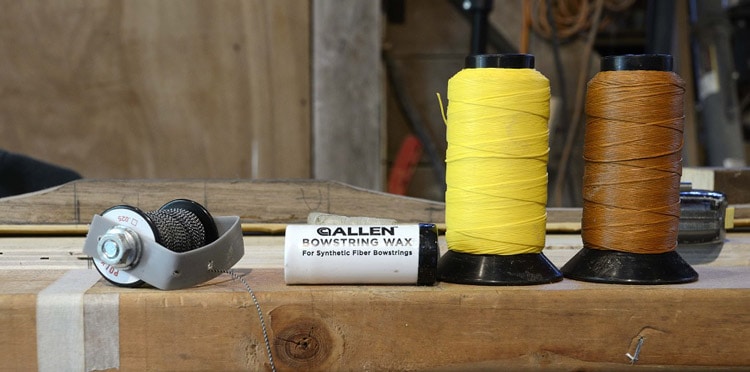
- Beeswax
- Piece of leather
- Scissors
Draw Weights
The length of the bow string you’re going to make should be 14-18 inches longer than the bow length. The number of strands you need to make a bow string depends on the draw weight range of your bow.
Here’s a short table of the various draw weights:
- 60-70 lbs = 16 strands
- 50-60 lbs = 14 strands
- 40-50 lbs = 12 strands
Single Loop
In making a single loop, it’s best to use different colors to distinguish the arrangement of the bundles correctly.
The strands should be grouped together according to their color. If you have a bow with draw weight range of 40 lbs., then you need to procure 12 strands.
In this case, 6 strands will go to Color X, and 6 strands will go to Color Y. This is only applicable if you want to do it with two colors, or simply called two bundles.
If the bow string has three bundles, then four strands will go to each three colors.
As you practice making bow strings, you are confident enough to get it done with just one color.

For this process, we will go with two bundles as it’s very easy to create. With six strands of Color X, the length of each strand should not be uniform. They should be shorter than the other so it would be better to cut diagonally.
The reason for doing this is it’s easier to do the looping as averse to uniform strand length. Do the same with Color Y.
Apply warmed beeswax into the bundles through a piece of leather. This indicates a uniform distribution of the wax to the strands of the Dacron material for better sticking. After that, align the bundles side by side.
Make a Rope from Two Bundles
To make a bow string is similar to making a typical rope. The next stage is to make a rope from two bundles by twisting them individually in the same direction, for example, clockwise. Start with hammering down the nail on a hard surface.
Then, from the first end of the bundles, measure up to seven inches and leave it untouched. Start making a rope after that measurement by twisting the bundles after the other in an alternate pacing.
You should shape the rope of about two inches like a half-crescent moon or simply semicircle. This will serve as the eye loop at the top part of a bow.
The untouched strands before and after the rope twist will then be blended and distinguished only by different colors. Seemingly, the bundles are thicker than the rope twist you just made.

Finish making the loop by twisting the mixed bundles like how you created a rope. Hook the loop into the nail.
The first few inches after the finished eye loop will be thicker but will gradually be thinner as the earlier measured seven inches has finished twisting and turning.
Stop making the rope twisting four inches before you reach the end of the bottom part. Make sure that the bundles are tight to each other so that you won’t have complications later.
The Bottom Part
The bottom part would be crucial for your bow string. You can make another eye loop by replicating the first one, but first, you should fit the bow string to the bow.
If you want it to be adjustable, do these steps. You can do an overhand knot to the end part or braid the remaining inches and then tie in the timber hitch to the loop.
Fit the bow string into your bow by placing the eye loop first into the top nock and twist the entire bow string as you fit the other end at your bow’s bottom nock.
The bow string has a tendency to stretch to adapt to its settings, but you can adjust the timber hitch to get the desired brace height.
Apply beeswax one more time into your bow string with a piece of leather so that it distributes uniformly.
Don’t Fire It Yet
Don’t fire arrows yet after you strung the bow string. Leave it for at least a day so the bow can effectively become accustomed to its new bow string.
This is the time you can attach server on your bow string so that it makes your string become longer lasting, stronger, and also for a smooth release. The materials for a good server are either nylon or monofilament.
Take a few inches from your spool and make half-hitch knots on the string’s nocking points you marked earlier.
Adjust how you wrap the server in your string so it won’t easily sever. When you’re done, do a tight knot that will not go loose.
Conclusion
From the above steps that we presented, you now have the knowledge on how to make a bow string. Now it’s finally time to test that bow equipped with a new bow string.
Though these steps are hard at first, practicing making loops and putting servers can amply help you when your bow string snaps yet again!