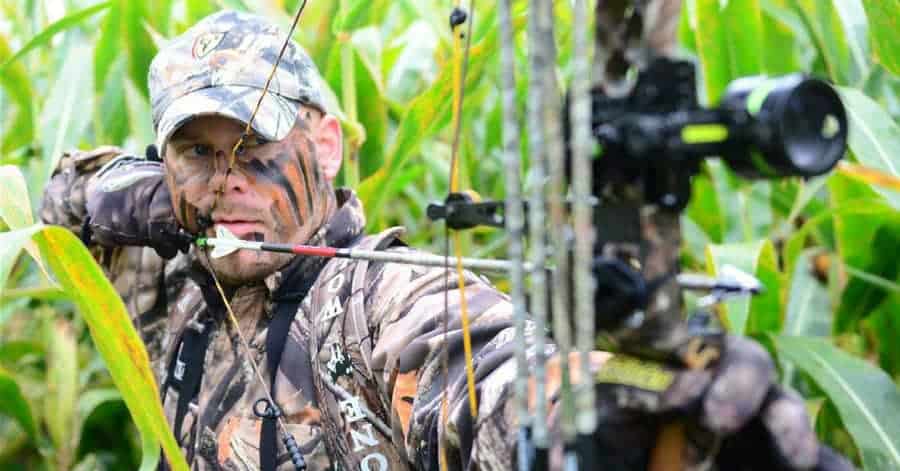
The anchor point is a particular spot somewhere on your nose, chin, or mouth, which your string or draw hand touches when the bow is ready to shoot or is fully drawn. One of the hardest things in archery is consistency in shooting your bow.
Each time you shoot your bow, you must be able to shoot the same way after each shot. You must be accurate enough to repeat each shot with precision.
To do that, you must have a solid anchor point which you can rely on no matter what the situation and the conditions are. So what is the best anchor point for drawing a bow?
The Basics
One of the first things you should know about an anchor point is it should be the same all the time. If you can’t maintain your anchor point, it means trouble in your part as the archer. This rule is one of the strictest rules of archery that assures you unsuccessful hunt should you dare to deviate from it.
Never the same, sometimes the same, and just almost the same, means a breach in your accuracy which further results in failed shots. There is also a possibility that your confidence will decrease eventually. So it’s your job to find your most comfortable anchor point that you think will help you in achieving a consistent, repeatable, shot every time.

What Anchor Point is The Best?
The anchor point is responsible for altering your finger placement (against your cheekbone and / or jaw), release-aid alignment, and draw length.
Moreover, your anchor point could also affect the view that you see through your peep sight. When looking plainly at a person, it would be hard to determine the perfect anchor point or where exactly they must place their hand against their face.
Know that there are multiple factors you should consider in determining the perfect anchor point for you. For instance, your bone structure and facial structure both play a role in your chances for a successful shot. So it is essential not to jump to any conclusion you deemed as good enough for you.
A sensible advice would be to get a qualified or a professional archery coach with the skill to help you determine your best anchor point.
Experiment is Ideal
You may as well don’t want to hire a personal archery and want to figure out things on your own. With that in mind, the ideal thing for you to do is to experiment on your own.
First, you have to set a temporary anchor point which you will use for your archery activities on a particular day. You are responsible for monitoring your own performance for that day. Assess the number of successful shots versus the number of failed attempts.
The next day, or your next archery session, set another temporary anchor point which you will use for your entire session that day. Make sure that you are entirely consistent with using that anchor point, again and again, every after shot. It is a way to ensure that your records are accurate and reliable. That way, you can assess your best anchor point eventually.
On the day after or your next archery activity after, you can set another temporary anchor point which will become your point for the whole day. Just like what you should do in the previous sessions, record or count the number of successful attempts versus the number of failed shots.
After that, you can then set another day for doing another archery with another anchor point.

Getting the Average
Get the percentage of your successful attempts versus the percentage of your failed shots. You can do this by doing a hundred shots and count how many out of that one hundred shots did your shot is successful.
It is not guaranteed that you’ll be able to use the same anchor point after each shot. In determining your percentage of success, each time you use a different anchor point is considered void and must not be counted whether it is a success or a fail. Also, the same scenario also means you can’t count that as part of your number of attempts.
If you’re not able to make it a hundred shots, say, you only made eighty trial shots with a particular anchor point, you can still get your percentage out of that. All you need is to do a simple math – ratio and proportion.
For example, if you’re able to make 40 successful shots out of 80 attempts, it means that you have a 50% rate of success.
The procedure is quite simple. In case you still don’t know how; try to understand this math. Use the same example: 40 success shots / 80 trials. You just multiply your number of successful shots (in this case, 40) then divide the result by the number of trials you made (in this case, 80).
40 x 100 = 4000. Then, 4000 / 80 = 50
So as a result, successfully shooting a target 40 times out of 80 attempts means you have 50% rate of success.
Experimenting for the best anchor point would be best evaluated if you always use a stationary target – something that doesn’t move or can’t move at all like a material object. Having a target like an animal, for instance, increases the number of factors that affect your chances of a successful shot.
By using a stagnant object, you filter out a bunch of factors that may affect your shot. Thus, making your experiment more reliable. It means you can rely on your results in determining what your best anchor point is.
Also, when trying out different anchor points, you are not entitled to just try any random portion in your face or cheeks. You must try only those parts that you are comfortable with.
Conclusion
Determining the best anchor point for drawing a bow is not an overnight success.
It would take multiple days, sometimes several weeks before you can finally assess that a particular facial portion is the best way to anchor your bow. When you finally do, hone your archery skills by perfecting your