
This site stays free thanks to small commissions from links like the ones below — it never costs you anything extra, and it never changes what we recommend. As an Amazon Associate we earn from qualifying purchases. Learn more.
In cold or wet conditions, shelter is the priority that keeps you alive — more urgent than fire, water, or food. Exposure can incapacitate you in a few hours. This guide covers how to build a survival shelter: six practical types from fastest to most involved, where to put one, and how to insulate it so it actually keeps you warm.
Quick answer
Get out of the wind and rain and off the cold ground. The fastest option is an emergency bivvy or a tarp and paracord. With no gear, build a small debris hut: a frame of branches packed with two feet of leaves and duff, just big enough to crawl into. Keep it small, keep it insulated, and put a thick bed of dry material underneath you.
Choosing the site
- Dry and drained. Not a gully, dry creek bed, or the low point of a slope where cold air and water collect.
- Sheltered from wind but not directly under large dead branches (“widowmakers”) or lone tall trees in a lightning-prone area.
- Near resources — building material, firewood, and water — but not right on a game trail or an ant nest.
- Visible-ish if you want to be found: near a clearing or edge you can signal from, not deep in thick timber.
- Build before dark. Everything takes longer than you think.
The rule that matters: insulate under and around you
The ground pulls heat out of your body faster than cold air does. Before you worry about a roof, pile 6–12 inches of dry leaves, grass, pine boughs, or debris to lie on — it will compress to a few inches. Then make the interior space just big enough for your body; a large shelter is a cold shelter because your body can’t warm the air. A foam pad or even your empty pack under your torso makes a big difference.
6 survival shelters, fastest to slowest
1. Emergency bivvy or space blanket (seconds)
A reflective bivvy sack weighs a few ounces and turns a survivable-but-miserable night into a survivable one. Get inside, get off the ground onto anything insulating, and vent it slightly so condensation doesn’t soak you.
2. Tarp lean-to (2–5 minutes)
Tie a ridgeline between two trees at hip-to-chest height, drape a tarp over it, stake the back edge to the ground, and angle the open side away from the wind and toward a fire. Fast, adjustable, sheds rain well. Add a second tarp or a debris pile as a back wall for cold nights.
3. Tarp A-frame (5 minutes)
Same ridgeline, but pull both sides of the tarp down and stake them, making a tent shape. More weather protection than a lean-to, less heat capture from a fire. Good for wind-driven rain.
4. Natural lean-to (20–40 minutes, no gear)
Lean a long ridgepole from the ground into the fork of a tree or across two supports. Lay branches along it at an angle, then shingle debris — leaves, boughs, bark — from the bottom up, at least a hand-span thick, so rain runs off. Fill gaps. Face the opening away from wind.
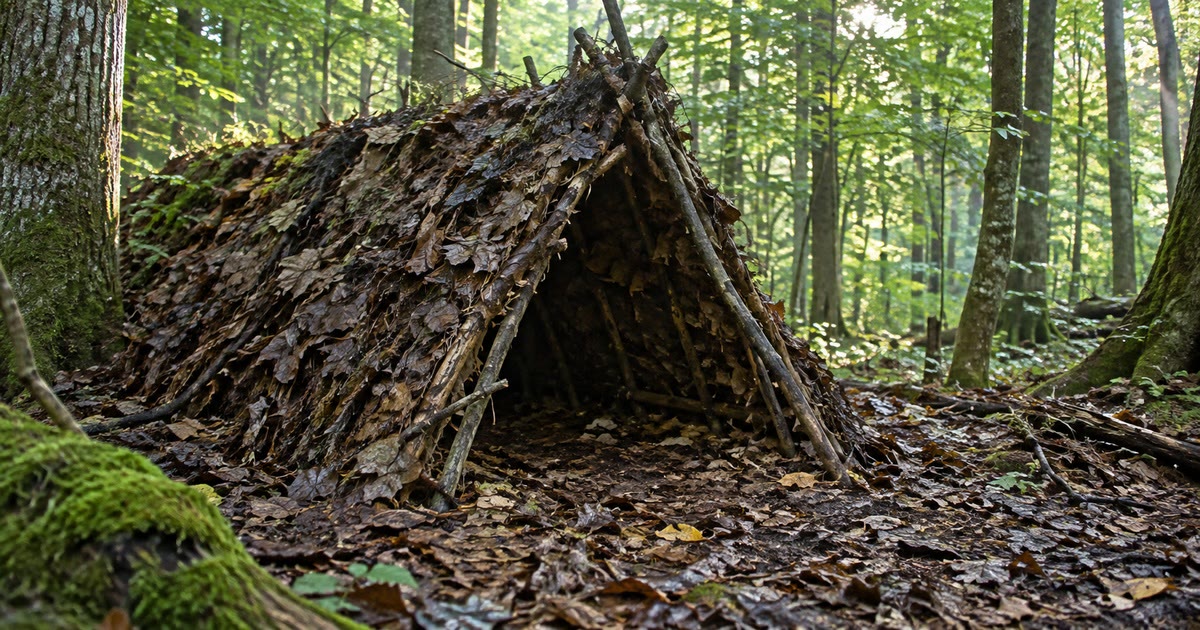
5. Debris hut (1–2 hours, no gear, best warmth)
The warmest no-gear shelter. Prop one end of a sturdy ridgepole (about 1.5× your height) on a knee-high support and the other on the ground. Lean ribbing sticks along both sides to make an A-shaped tunnel just wide enough for your shoulders. Cover the ribbing with a lattice of small branches, then pile two to three feet of leaves and debris over the whole thing — more than feels necessary. Stuff the inside with a thick bed of dry leaves. Plug the entrance with a debris “door” once you’re in. Done right, it stays warm with body heat alone.
6. Snow shelters (30–90 minutes, deep snow)
Snow is an insulator. A quinzhee is a mound of piled snow left to sinter for an hour, then hollowed out. A snow trench is a body-width trench roofed with branches or a tarp and snow blocks. In both, poke a ventilation hole, keep the sleeping platform above the entrance (cold air sinks out), insulate heavily beneath you, and never bring an open flame or a running stove inside — carbon monoxide and collapse are real risks.
Adding a fire safely
A lean-to plus a fire a few feet from the open side, with a log or rock reflector behind the fire, roughly doubles the useful warmth. Keep the fire small and controlled, clear flammable debris in a wide circle, and never build a fire inside or at the mouth of an enclosed shelter full of dry leaves.
Common mistakes
- No ground insulation. A roof without a bed underneath you still lets the earth drain your heat all night.
- Building it too big. Extra space is extra cold air your body has to heat.
- Thin debris covering. If light comes through, rain and cold come through. Go thicker than looks right.
- Bad site. Low ground floods; ridgetops get wind; dead branches overhead fall.
- Starting at dusk. Scout and build with daylight to spare.
Frequently asked questions
What is the warmest survival shelter you can build without any gear?
A properly built debris hut: a small A-frame tunnel just big enough for your body, covered with two to three feet of leaves and debris, with a thick bed of dry material inside and the entrance plugged. It traps body heat and can keep you warm in freezing temperatures.
Why do you need to insulate the ground in a survival shelter?
The ground conducts heat away from your body far faster than cold air does. Without 6 to 12 inches of dry leaves, boughs, or a foam pad underneath you, you’ll lose heat all night no matter how good the roof is.
How small should a survival shelter be?
Just big enough to crawl into and lie down. Your body has to warm the air inside, so a coffin-sized space warms up; a room-sized one never does.
Can you have a fire inside a survival shelter?
Not inside an enclosed debris or snow shelter — the fire risk and carbon monoxide are deadly. Build the fire outside a lean-to or open-front shelter, a safe distance away, with a reflector behind it to push heat toward you.
How long does it take to build a debris hut?
Usually one to two hours for a first-timer, longer in poor material. That’s why site selection and starting well before dark matter, and why a lightweight tarp or bivvy in your pack is worth carrying.
Is a tarp or a natural shelter better?
A tarp is faster, lighter to carry, sheds rain better, and is adjustable, so it’s the better choice if you have one. Natural shelters are the fallback when you have no gear, and a debris hut can actually be warmer than a bare tarp in the cold.
Bottom line
Pick a dry, wind-sheltered site, insulate heavily underneath you, and keep the space small. If you carry a tarp or bivvy, you have shelter in minutes; if you don’t, a debris hut built before dark will get you through a cold night on body heat alone.
Related guides:
- How to Start a Fire Without Matches
- How to Purify Water in the Wild
- 15 Wilderness Survival Skills Everyone Should Know
- How to Build the Perfect 72-Hour Survival Kit
This article is for general informational purposes only. Practice shelter-building skills before you need them and follow local land-use rules. Sources: U.S. Army Field Manual FM 21-76 (Survival); U.S. National Park Service; Leave No Trace Center for Outdoor Ethics.